
This recipe is based on an old standby – Zucchini Appetizer. The proportion of zucchini and the concept from the original recipe are similar, but this recipe uses some different herbs, extra veggies and more cheese. The Bisquick from the original recipe is replaced by using flour, baking powder, and a little more olive oil instead, as I prefer not to use processed mixes.
The extra veggies make the Squares colorful and moist, and the minute my husband hears the words “Peppers and Onions” he thinks of the word he most associates with peppers and onions – sausage! This makes the Squares seem more like a treat, rather than a way to use up the zucchini in the fridge. Sorry, Mike, but there is no sausage in this dish! You can make some of your famous Italian sausage “coins” and eat them on the side, as the peppers and onions in this dish are a natural compliment to the sausage.
The Squares are great as an appetizer – eaten hot, or at room temperature. Perfect for Happy Hour! I recommend an ice cold Sam Adams Summer Seasonal Beer (or two) to accompany this snack.
I also love them as a meatless main dish, although your carnivores may prefer to follow my husband’s lead and enjoy it with Italian sausage.
Anyway you eat them, enjoy this simple and easy to make seasonal dish. Always tastes the best in the summer, using local produce. Thanks Mom and Jer, for giving us the fruits of your labor from your fantastic garden!
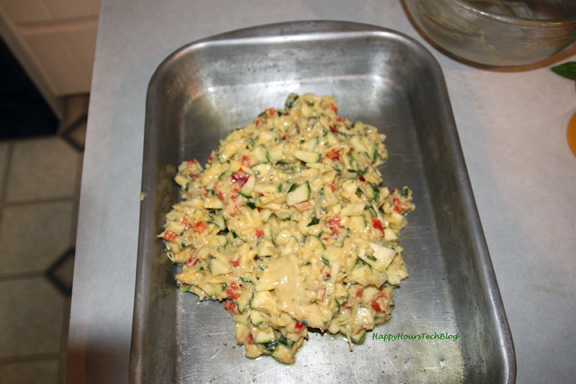
The key to getting consistent results in this dish is in the chopping. This close up shows the sizes of the various ingredients. The cooking time for my recipe is based on veggies cut this size. Many times when I have shared this recipe, people have said that their veggies were not cooked very well. I am sharing this picture to help with that problem.

Ingredients
3 cups chopped, unpeeled zucchini. (NOTE: I usually use small zucchinis, and cut them into quarters the long way. Then stack the 4 long strips, and slice them into thin, little chunks. (Please see the above photo for size and shape of zucchini.)
1 cup red bell pepper, diced finely (or use your favorite pepper assortment to make a mixed cup)
1 cup of sweet onion, diced finely
1 tablespoon of fresh garlic, pressed or very finely chopped
1 cup freshly grated Parmesan cheese (It is fluffier so it measures differently than the grated cheese that you get already grated in the store. If you get the one already grated in the store, you might want to reduce it a little. Or not. Cheese is good.)
2 tablespoons of chopped fresh basil leaves (chop the leaves first and then measure the chopped leaves into the tablespoon)
1 teaspoon dried oregano or 2 tablespoons of fresh Greek oregano leaves, chopped
2/3 cup olive oil
4 large eggs
1 cup unbleached all purpose white flour
1/2 teaspoon salt
2 1/4 teaspoons baking powder
Optional: extra basil leaves or red pepper strips for garnish
Procedure
Preheat the oven to 350º.
- Chop the zucchini, red peppers, onion, garlic, and basil leaves, pouring them into a large bowl after each is chopped. Dice the peppers, onions and garlic into a small dice so that they cook in the specified time.

- Add the oregano and Parmesan cheese to the veggies, and mix with a fork to distribute it well.
- Break the eggs into a bowl, add the olive oil, and whisk together Pour this into the veggie mix and stir well with a wooden spoon.
- Sift together the flour, salt, and baking powder. Stir these dry ingredients into the other mix and blend well. Mixture will be thick.
- Pour into a GREASED 9×13 cake pan. Make SURE that the pan is greased or this will really be hard to remove from the pan. The size of the pan is important to the cooking time. If you use a different size and shape pan, cooking time may have to be adjusted.

6. Use a butter knife to spread the mixture evenly in the pan.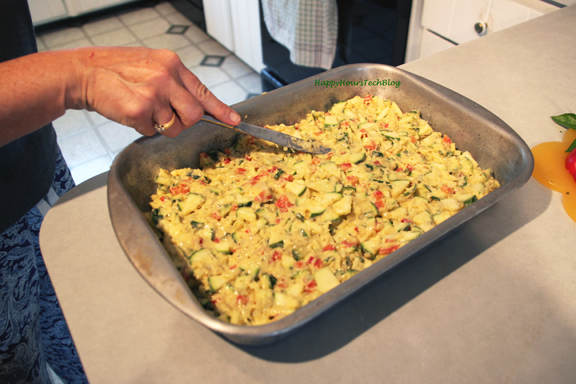
7. Bake for about 30 minutes, or until the edges start to turn light golden brown and the top is set.

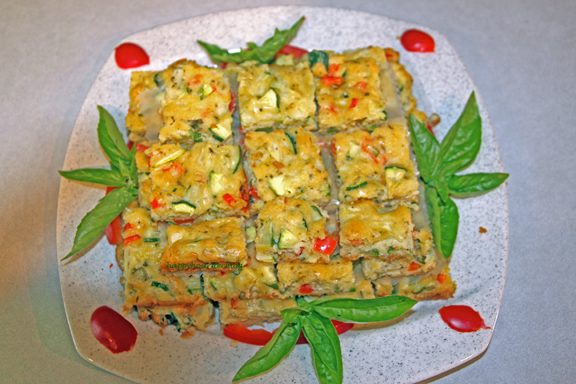
In the photo below, notice the golden brown color of the edges of the cut square. The corners and outside should be this color when the pan comes out of the oven.

- Let this rest for at least 20 minutes, then cut into small squares, usually about 2 inches. Sometimes I cut them a bit bigger and then cut them again to make triangles. This one is garnished with fresh basil leaves and red peppers as this tray is ready to party.
Going to Happy Hour!
Baking and Serving Tips:
Ideas for Variations: The first time this dish is made, taste it to see how to customize it to suit YOU. Do you like other peppers, black olives, more salt, other herbs, less onions? It is easy to modify the spices, herbs and veggies and still get great result.
When stacking them up on a plate, place waxed paper in between the layers. Trim the waxed paper squares with a pinking scissors to make the edges look nice. I usually turn the squares that have the golden edges to the inside to hide them on the plate, but I wanted to show the color of the edges, which helps first timers to see the color it should be when it is done.

These can be eaten hot, right out of the oven, or at room temperature. If making them a day ahead, take them out of the fridge 30 minutes before they will be eaten so that they are not ice cold.
Reheat them as you need them – either in the microwave, or in a non-stick pan that has a little olive oil or butter in it.
